
Notice
Recent Posts
Recent Comments
Link
| 일 | 월 | 화 | 수 | 목 | 금 | 토 |
|---|---|---|---|---|---|---|
| 1 | 2 | 3 | ||||
| 4 | 5 | 6 | 7 | 8 | 9 | 10 |
| 11 | 12 | 13 | 14 | 15 | 16 | 17 |
| 18 | 19 | 20 | 21 | 22 | 23 | 24 |
| 25 | 26 | 27 | 28 | 29 | 30 | 31 |
Tags
- git
- FIle
- 상속
- Spring
- 시큐어코딩
- 함수
- 스타일보험
- sub query
- kotlin
- Spinner
- 스프링
- SQL
- java
- React
- degit
- 코틀린
- 쿠키
- webpack
- parcel
- 안드로이드
- java#왕초보
- 게시판
- snowpack
- 숫자
- Android
- 오버라이드
- 미니게임
- 왕초보
- 버전일치
- 답글
Archives
- Today
- Total
YSHUSH
싱글턴 (Singleton) 본문
Singleton은 단 하나의 instance(객체)를 의미한다.
싱글턴에 데이터를 넣고 그 데이터를 가지고 화면전환을 해보자
1. app - src - main - java - 메인패키지 우클릭 - 새로만들기 - kotlin 클래스/파일 - Singleton으로 생성
Singleton.kt
class Singleton {
    companion object{
        var Chicken:String? = null
    }
}

/*
    // java
    class Singleton{
        private static Singleton st = null

        private Singleton(){

        }

        public static Singleton getInstance(){
            if(st == null){
                st = new Singleton()
            }
            return st
        }
    }

    st.number = number
    number = st.number

*/
2. app - src - main - java - 메인패키지 우클릭 - 새로만들기 - Activity - Empty Activity - SubActivity로 생성(activity_sub.xml자동 생성됨)
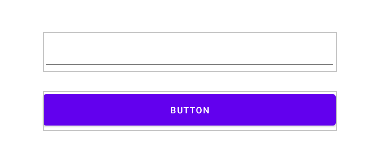
activity_main.xml
<?xml version="1.0" encoding="utf-8"?>
<androidx.constraintlayout.widget.ConstraintLayout
        xmlns:android="http://schemas.android.com/apk/res/android"
        xmlns:tools="http://schemas.android.com/tools"
        xmlns:app="http://schemas.android.com/apk/res-auto"
        android:layout_width="match_parent"
        android:layout_height="match_parent"
        tools:context=".MainActivity">
    <EditText
            android:layout_width="458dp"
            android:layout_height="61dp"
            android:inputType="textPersonName"
            android:ems="10"
            android:id="@+id/editText"
            app:layout_constraintTop_toTopOf="parent" app:layout_constraintStart_toStartOf="parent"
            app:layout_constraintEnd_toEndOf="parent" app:layout_constraintBottom_toBottomOf="parent"/>
    <Button
            android:text="Button"
            android:layout_width="458dp"
            android:layout_height="61dp" android:id="@+id/move"
            app:layout_constraintTop_toBottomOf="@+id/editText"
            app:layout_constraintStart_toStartOf="parent" app:layout_constraintEnd_toEndOf="parent"
            android:layout_marginTop="32dp"/>
</androidx.constraintlayout.widget.ConstraintLayout>
3. activity_sub.xml
<androidx.constraintlayout.widget.ConstraintLayout
        xmlns:android="http://schemas.android.com/apk/res/android"
        xmlns:tools="http://schemas.android.com/tools"
        xmlns:app="http://schemas.android.com/apk/res-auto"
        android:layout_width="match_parent"
        android:layout_height="match_parent"
        tools:context=".SubActivity">

    <TextView
            android:text="TextView"
            android:layout_width="360dp"
            android:layout_height="102dp"
            android:id="@+id/textView"
            android:textSize="30dp"
            android:gravity="center"
            app:layout_constraintTop_toTopOf="parent"
            app:layout_constraintStart_toStartOf="parent"
            app:layout_constraintEnd_toEndOf="parent"
            app:layout_constraintBottom_toBottomOf="parent"/>
</androidx.constraintlayout.widget.ConstraintLayout>
4. MainActivity.kt
class MainActivity : AppCompatActivity() {
    override fun onCreate(savedInstanceState: Bundle?) {
        super.onCreate(savedInstanceState)
        setContentView(R.layout.activity_main)

        val editText = findViewById<EditText>(R.id.editText)
        val move = findViewById<Button>(R.id.move)

        move.setOnClickListener{
            Singleton.Chicken = editText.text.toString()

            val intent = Intent(this, SubActivity::class.java)
            startActivity(intent)

        }
    }
}
5. SubActivity.kt
class SubActivity : AppCompatActivity() {
    override fun onCreate(savedInstanceState: Bundle?) {
        super.onCreate(savedInstanceState)
        setContentView(R.layout.activity_sub)

        val textView = findViewById<TextView>(R.id.textView)

        textView.text = Singleton.Chicken

    }
}'Coding > Android(kotlin)' 카테고리의 다른 글
| TextInputLayout - AppCompatEditText 밑줄제거 (0) | 2022.03.17 |
|---|---|
| SQLite(CRUD) (0) | 2022.02.10 |
| 화면 전환(Intent) (0) | 2022.02.10 |
| 화면 전환(Preference) (0) | 2022.02.10 |
| JSON (0) | 2022.02.10 |
'Coding/Android(kotlin)' Related Articles
more


