
Notice
Recent Posts
Recent Comments
Link
| 일 | 월 | 화 | 수 | 목 | 금 | 토 |
|---|---|---|---|---|---|---|
| 1 | 2 | 3 | ||||
| 4 | 5 | 6 | 7 | 8 | 9 | 10 |
| 11 | 12 | 13 | 14 | 15 | 16 | 17 |
| 18 | 19 | 20 | 21 | 22 | 23 | 24 |
| 25 | 26 | 27 | 28 | 29 | 30 | 31 |
Tags
- degit
- kotlin
- 버전일치
- 왕초보
- 답글
- sub query
- 함수
- 오버라이드
- git
- 안드로이드
- FIle
- 코틀린
- SQL
- 스프링
- Spinner
- webpack
- React
- 숫자
- 상속
- 게시판
- snowpack
- parcel
- java
- 쿠키
- 스타일보험
- Android
- Spring
- 미니게임
- java#왕초보
- 시큐어코딩
Archives
- Today
- Total
YSHUSH
Navigation menu 본문
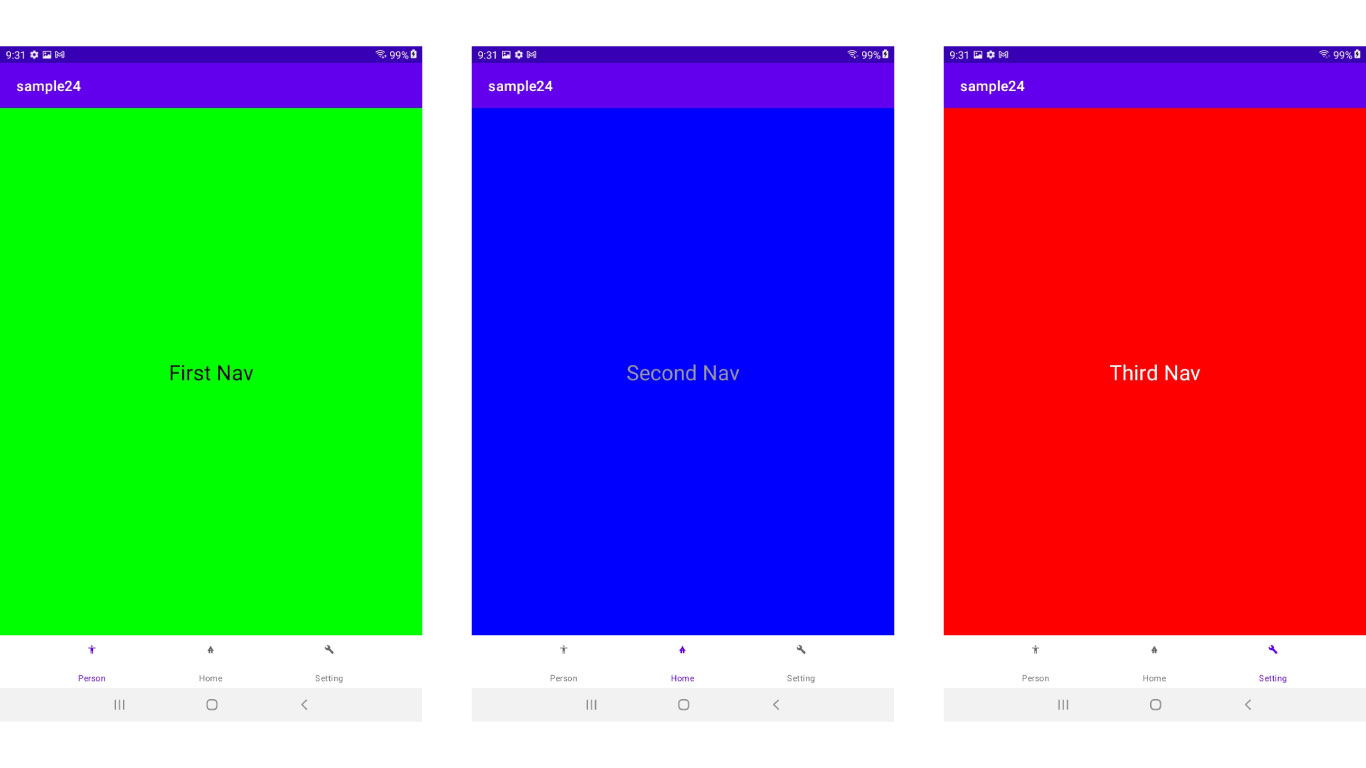
네비게이션 메뉴를 만들어보고
메뉴를 누를때마다 화면을 전환해보자
1. build.gradle내 plugins에 추가
id 'kotlin-android-extensions'2. build.gradle내 dependencies에 추가
implementation 'com.google.android.material:material:1.2.0'
3. activity_main.xml
<?xml version="1.0" encoding="utf-8"?>
<androidx.constraintlayout.widget.ConstraintLayout
        xmlns:android="http://schemas.android.com/apk/res/android"
        xmlns:tools="http://schemas.android.com/tools"
        xmlns:app="http://schemas.android.com/apk/res-auto"
        android:layout_width="match_parent"
        android:layout_height="match_parent"
        tools:context=".MainActivity">

    <FrameLayout
            android:id="@+id/flFragment"
            android:layout_width="match_parent"
            android:layout_height="0dp"
            app:layout_constraintBottom_toTopOf="@+id/bottomNaviView"
            app:layout_constraintEnd_toEndOf="parent"
            app:layout_constraintHorizontal_bias="0.5"
            app:layout_constraintStart_toStartOf="parent"
            app:layout_constraintTop_toTopOf="parent">
    </FrameLayout>

    <com.google.android.material.bottomnavigation.BottomNavigationView
            android:id="@+id/bottomNaviView"
            android:layout_width="match_parent"
            android:layout_height="75dp"
            app:layout_constraintBottom_toBottomOf="parent"
            app:layout_constraintEnd_toEndOf="parent"
            app:layout_constraintHorizontal_bias="0.5"
            app:layout_constraintStart_toStartOf="parent"
            app:menu="@menu/bottom_nav_menu"
    />

</androidx.constraintlayout.widget.ConstraintLayout>
4. app - src - main - res폴더 우클릭 - 새로만들기 - 경로 - menu로 폴더생성
5. menu폴더 우클릭 - 새로만들기 - Menu 리소스 파일 - bottom_nav_menu로 생성
bottom_nav_menu.xml
<?xml version="1.0" encoding="utf-8"?>
<menu xmlns:android="http://schemas.android.com/apk/res/android">
    <item android:id="@+id/person"
          android:title="Person"
          android:icon="@drawable/ic_person_foreground" />

    <item android:id="@+id/home"
          android:title="Home"
          android:icon="@drawable/ic_home_foreground" />

    <item android:id="@+id/setting"
          android:title="Setting"
          android:icon="@drawable/ic_setting_foreground" />
</menu>
6. app - src - main - res - drawable폴더 우클릭 - 새로만들기 - Image Asset
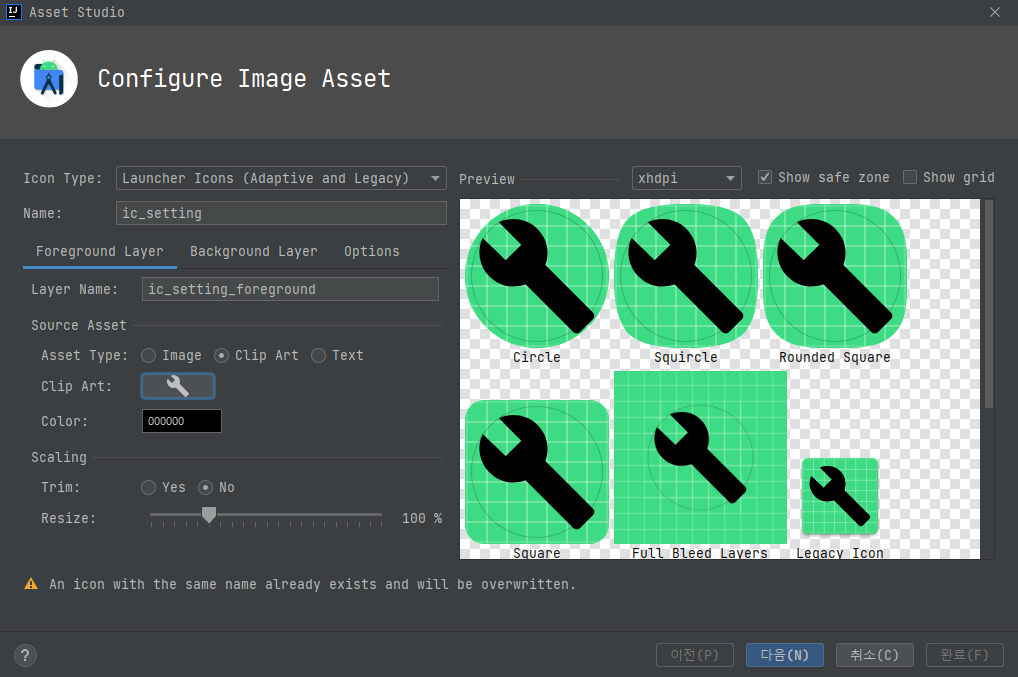
이런 창이 나오는데 Clip Art를 누르고 아이콘 설정 - Name 바꿔주기 - 다음 - 완료 해주면 drawable폴더 내에 아이콘이 생성된다.
7. app - src - main - res - layout폴더 우클릭 - 새로만들기 - XML - Layout XML File
- activity_fragment_one부터 three까지 생성(화면 생성하는 것)
activity_fragment_one
<androidx.constraintlayout.widget.ConstraintLayout
        xmlns:android="http://schemas.android.com/apk/res/android"
        xmlns:tools="http://schemas.android.com/tools"
        xmlns:app="http://schemas.android.com/apk/res-auto"
        android:background="#00ff00"
        android:layout_width="match_parent"
        android:layout_height="match_parent">

    <TextView
            android:text="First Nav"
            android:textSize="30sp"
            android:textColor="@color/black"
            android:layout_width="wrap_content"
            android:layout_height="wrap_content"
            app:layout_constraintTop_toTopOf="parent"
            app:layout_constraintBottom_toBottomOf="parent"
            app:layout_constraintStart_toStartOf="parent"
            app:layout_constraintEnd_toEndOf="parent"/>

</androidx.constraintlayout.widget.ConstraintLayout>
activity_fragment_two
<?xml version="1.0" encoding="utf-8"?>
<androidx.constraintlayout.widget.ConstraintLayout
        xmlns:android="http://schemas.android.com/apk/res/android"
        xmlns:tools="http://schemas.android.com/tools"
        xmlns:app="http://schemas.android.com/apk/res-auto"
        android:background="#0000ff"
        android:layout_width="match_parent"
        android:layout_height="match_parent">

    <TextView
            android:text="Second Nav"
            android:textSize="30sp"
            android:textColor="#999999"
            android:layout_width="wrap_content"
            android:layout_height="wrap_content"
            app:layout_constraintTop_toTopOf="parent"
            app:layout_constraintBottom_toBottomOf="parent"
            app:layout_constraintStart_toStartOf="parent"
            app:layout_constraintEnd_toEndOf="parent"/>

</androidx.constraintlayout.widget.ConstraintLayout>
activity_fragment_three
<?xml version="1.0" encoding="utf-8"?>
<androidx.constraintlayout.widget.ConstraintLayout
        xmlns:android="http://schemas.android.com/apk/res/android"
        xmlns:tools="http://schemas.android.com/tools"
        xmlns:app="http://schemas.android.com/apk/res-auto"
        android:background="#ff0000"
        android:layout_width="match_parent"
        android:layout_height="match_parent">

    <TextView
            android:text="Third Nav"
            android:textSize="30sp"
            android:textColor="@color/white"
            android:layout_width="wrap_content"
            android:layout_height="wrap_content"
            app:layout_constraintTop_toTopOf="parent"
            app:layout_constraintBottom_toBottomOf="parent"
            app:layout_constraintStart_toStartOf="parent"
            app:layout_constraintEnd_toEndOf="parent"/>

</androidx.constraintlayout.widget.ConstraintLayout>
8. app - src - main - java폴더 내 메인패키지 폴더 우클릭 - 새로만들기
- kotlin 클래스/파일 FragmentOne부터 Three까지 생성
FragmentOne
class FragmentOne:Fragment(R.layout.activity_fragment_one){}FragmentTwo
class FragmentTwo:Fragment(R.layout.activity_fragment_two){}FragmentThree
class FragmentThree:Fragment(R.layout.activity_fragment_three){}
9. MainActivity.kt
class MainActivity : AppCompatActivity() {
    override fun onCreate(savedInstanceState: Bundle?) {
        super.onCreate(savedInstanceState)
        setContentView(R.layout.activity_main)

        val firstFragment = FragmentOne()
        val secondFragment = FragmentTwo()
        val thirdFragment = FragmentThree()

        setCurrentFragment(firstFragment)

        bottomNaviView.setOnNavigationItemSelectedListener() {
            when(it.itemId){
                R.id.person->setCurrentFragment(firstFragment)
                R.id.home->setCurrentFragment(secondFragment)
                R.id.setting->setCurrentFragment(thirdFragment)
            }
            true
        }
    }

    fun setCurrentFragment(fragment: Fragment)=
        supportFragmentManager.beginTransaction().apply {
            replace(R.id.flFragment, fragment)
            commit()
        }
}
'Coding > Android(kotlin)' 카테고리의 다른 글
| Rating bar (0) | 2022.02.08 |
|---|---|
| Seek bar (0) | 2022.02.08 |
| Fragment (0) | 2022.02.08 |
| Spinner2 (0) | 2022.02.08 |
| Spinner (0) | 2022.02.08 |
'Coding/Android(kotlin)' Related Articles
more


